
Bread In A Bag brings a fun twist to homemade bread, especially when you bake with kids. This article shares a personal story, step-by-step guidance, helpful tips, and answers to common questions. You will learn how to turn a simple Bread In A Bag activity into a memorable kitchen moment while making a soft and tasty loaf.
Bread In A Bag Story & Introduction
A Fun Memory with Bread In A Bag
I still remember the first time I tried Bread In A Bag with a group of kids during a weekend baking session. The kitchen filled with laughter as little hands squeezed the bag, mixing flour and yeast with pure excitement. Bread In A Bag felt less like cooking and more like play. That moment showed me how simple baking can turn into a joyful activity.
Bread In A Bag quickly became a favorite in our home. It removed the mess of traditional mixing bowls, and kids stayed engaged from start to finish. Instead of worrying about spills, we focused on learning and having fun. The best part came when the bread baked and filled the kitchen with a warm aroma. Everyone felt proud of their creation.
Why Bread In A Bag Is Perfect for Kids Baking
Bread In A Bag works well for kids baking because it keeps everything contained and simple. Kids can mix ingredients safely without creating a big mess. This method also teaches basic baking skills like measuring, mixing, and patience.
Parents and teachers often use Bread In A Bag for preschool baking activities. It builds confidence and makes learning enjoyable. Kids love seeing dough form right in their hands. They also understand how ingredients change during the process. Bread In A Bag turns a simple recipe into a hands-on lesson that feels exciting and rewarding.
Easy Bread In A Bag Recipe Guide
Step-by-Step Bread In A Bag Process
Start by adding one cup of flour, sugar, yeast, and warm water into a large zip-top bag. Seal the bag and mix until smooth. Let the mixture rest until bubbles appear. This step helps activate the yeast and gives the bread its light texture.
Next, add another cup of flour, salt, and olive oil. Seal the bag again and mix well. Then, add the final cup of flour and continue mixing until the dough forms. Remove the dough and knead it on a floured surface. This step builds structure and improves texture.
Key Tips for Easy Bread Recipe Success
Use warm water, not hot, to keep the yeast active. If the water feels too hot, it can stop the yeast from working. Also, knead the dough well to create a soft and elastic texture.
Let the dough rise in a warm place for the best results. Cover it with a towel and give it enough time to grow. When baking, check for a golden color and a hollow sound when tapped. These signs show the bread is ready.
Bread In A Bag for Preschool and Family Fun
Preschool Baking Benefits with Bread In A Bag
Bread In A Bag works well in preschool settings because it keeps the process simple and controlled. Teachers can guide kids step by step without worrying about cleanup. Kids develop motor skills as they squeeze and mix ingredients.
This activity also teaches patience. Kids wait for the dough to rise and then see the final result. It builds curiosity and helps them understand how food is made. Bread In A Bag connects learning with real-life skills in a fun way.
Making Bread In A Bag a Family Activity
Families enjoy Bread In A Bag because everyone can join in. Younger kids mix the dough, while older ones help with kneading and shaping. This shared activity creates lasting memories.
You can also customize the recipe by adding herbs or cheese. Each batch becomes unique and exciting. Bread In A Bag encourages creativity and teamwork in the kitchen. It turns baking into a bonding experience.
Common Mistakes and How to Fix Them
Bread In A Bag Troubleshooting Tips
Sometimes the dough may feel too sticky. In that case, add a small amount of flour and mix again. If the dough feels too dry, add a few drops of water. Adjusting slowly helps maintain the right texture.
If the bread does not rise, the yeast may not be active. Always check the freshness of yeast before starting. Also, keep the dough in a warm place to support rising.
How to Get the Best Texture and Flavor
Kneading plays a key role in texture. Spend enough time kneading to develop elasticity. This step creates a soft and fluffy loaf.
Baking time also matters. Do not remove the bread too early. Wait until it turns golden and sounds hollow when tapped. Let it cool before slicing to keep the texture perfect.
Bread In A Bag Variations and Serving Ideas
Creative Bread In A Bag Variations
You can change Bread In A Bag by adding simple ingredients. Try mixing in herbs for extra flavor or a bit of cheese for a richer taste. These small changes make each loaf special.
Sweet variations also work well. Add a touch of cinnamon and sugar for a dessert-style bread. Bread In A Bag adapts easily to different tastes and preferences.
Serving and Enjoying Your Homemade Bread
Serve Bread In A Bag warm with butter or jam for a simple treat. It also pairs well with soups and salads. Fresh bread adds comfort to any meal.
Store leftovers in an airtight container to keep them fresh. Reheat slices slightly before serving to bring back the soft texture. Bread In A Bag stays delicious even the next day.
FAQ Section
What is Bread In A Bag?
Bread In A Bag is a simple method of making bread using a zip-top bag for mixing ingredients.
Is Bread In A Bag good for kids?
Yes, it works well for kids because it is easy, safe, and less messy.
Can I use regular yeast instead of rapid-rise?
Yes, but you may need to increase the rising time slightly.
How do I know when the bread is done?
The bread turns golden and sounds hollow when tapped.
Can I freeze Bread In A Bag?
Yes, you can freeze it and reheat when needed.
Conclusion
Bread In A Bag offers a simple and fun way to bake at home. It brings families together and helps kids learn basic cooking skills. With easy steps and flexible options, this recipe fits any kitchen. Try Bread In A Bag and enjoy the process as much as the final loaf.
Print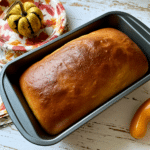
Bread In A Bag
- Total Time: 1 hour 30 minutes
- Yield: 1 loaf 1x
- Diet: Vegetarian
Description
Bread In A Bag is a fun, easy bread recipe perfect for kids baking, preschool activities, and family kitchen time.
Ingredients
3 cups all-purpose flour, divided
1 packet (2¼ teaspoons) rapid-rise yeast
3 tablespoons granulated sugar
1½ teaspoons salt
1 cup warm water (about 110°F / 43°C)
3 tablespoons olive oil
Instructions
1. Place 1 cup of flour, sugar, yeast, and warm water into a large zip-top bag
2. Seal the bag and squeeze until the mixture is smooth
3. Let it rest for 10–15 minutes until bubbly
4. Add another cup of flour, salt, and olive oil, then mix well
5. Add the remaining flour and mix until a soft dough forms
6. Remove the dough and knead on a floured surface for 8–10 minutes
7. Place in a greased pan or shape into a loaf and let rise 30–45 minutes
8. Bake at 375°F (190°C) for 25–30 minutes until golden brown
9. Cool for 10 minutes before slicing
Notes
Use warm water, not hot, to activate yeast properly
Knead dough well for soft texture
Let the bread cool before slicing for best results
Great recipe for kids and beginners
- Prep Time: 15 minutes
- Cook Time: 30 minutes
- Category: Bread
- Method: Baking
- Cuisine: American
Nutrition
- Serving Size: 1 slice
- Calories: 180
- Sugar: 3g
- Sodium: 220mg
- Fat: 4g
- Saturated Fat: 0.5g
- Unsaturated Fat: 3g
- Trans Fat: 0g
- Carbohydrates: 30g
- Fiber: 1g
- Protein: 5g
- Cholesterol: 0mg
Keywords: Bread In A Bag, Kids Baking, Easy Bread Recipe, Preschool Baking